Getting Started
ProjectHub is an AI collective intelligence-powered project management app exclusively for macOS. Multiple AI engines debate and reach consensus to produce better code. This guide walks you through the process step by step, from installation to creating your first project.
System Requirements
| Item | Minimum | Recommended |
|---|---|---|
| Operating System | macOS 14.0 (Sonoma) | macOS 15.0 (Sequoia) or later |
| Processor | Apple Silicon (M1) or Intel | Apple Silicon (M1 Pro or higher) |
| Memory | 8GB RAM | 16GB RAM or more |
| Storage | 500MB | 2GB or more (including AI model cache) |
Additional Requirements for AI Features
The following tools are required to use ProjectHub's AI features.
ProjectHub's core features -- project management, snapshots, terminal, diagrams, and more -- are fully available without any AI CLI tools.
AI CLI Tools
To use the AI coding features (Vibe Coding, AI Agent, Avalon3, Colligi), install one or more of the following CLI tools:
| AI Engine | Installation | Prerequisites | Used By |
|---|---|---|---|
| Claude Code | npm install -g @anthropic-ai/claude-code | Node.js 18+ | Vibe Coding, AI Agent, Alliance |
| Gemini CLI | npm install -g @google/gemini-cli | Node.js 20+ | Vibe Coding, AI Agent, Avalon3 |
| Ollama | Download from ollama.com or brew install ollama | -- | Avalon3, Colligi |
| OpenCode | npm install -g opencode-ai | Node.js 18+ | Vibe Coding, Avalon3 |
If you do not have Node.js installed, download the LTS version from nodejs.org first. Gemini CLI requires Node.js 20 or later.
Installation
1. Download
Download the latest .dmg file from the ProjectHub website.

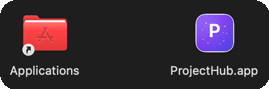
2. Install
- Double-click the downloaded
.dmgfile - Drag the ProjectHub icon to the Applications folder
- Unmount the
.dmg
3. First Launch
- Launch ProjectHub from the Applications folder or Launchpad
- If a macOS security warning appears, click Open
- Allow network access permissions (for P2P features)
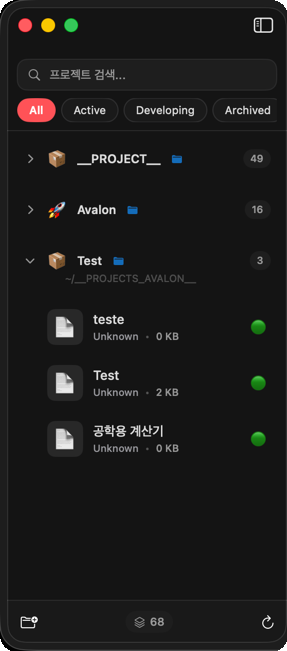
Interface Overview
When you first launch ProjectHub, the following layout is displayed:
| Area | Description |
|---|---|
| Sidebar (left) | Project list, groups, search, filters |
| Main Area (right) | Dashboard or detail view of the selected project |
| Toolbar (top) | Network status, dashboard, schedule, new project, scan buttons |
| Terminal Panel (bottom, toggle) | Integrated terminal (open/close with Command+T) |
Setting Up AI
Before using AI features, you need to configure AI providers in Settings > Intelligence. Without this setup, AI features such as Vibe Coding, AI Agent, and Avalon3 will not work.
Open Settings
Select ProjectHub > Settings (Command+,) from the menu, then click the Intelligence tab.
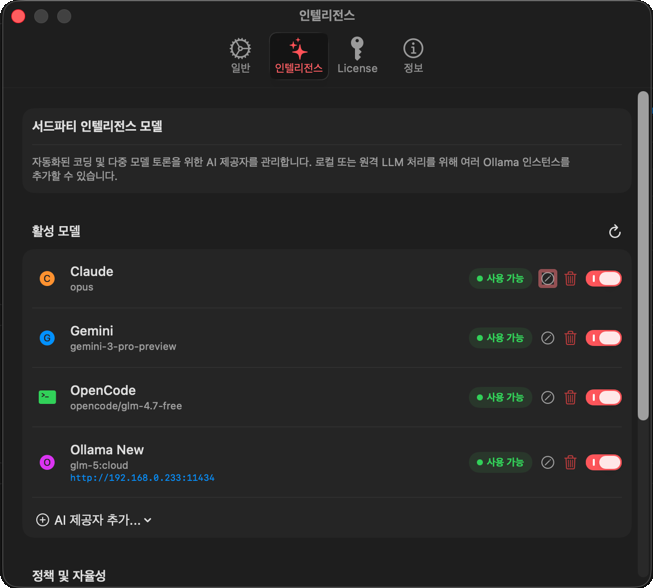
Adding AI Providers
ProjectHub supports 4 AI providers:
| Provider | Description | Installation Required |
|---|---|---|
| Claude | Anthropic Claude Code CLI | npm install -g @anthropic-ai/claude-code |
| Gemini | Google Gemini CLI | npm install -g @google/gemini-cli |
| OpenCode | Open-source AI CLI | npm install -g opencode-ai |
| Ollama | Local/remote AI models | Download from ollama.com |
- In the Active Models section, click the "Add AI Provider..." button
- Select the provider to add
- Choose a model in the edit sheet:
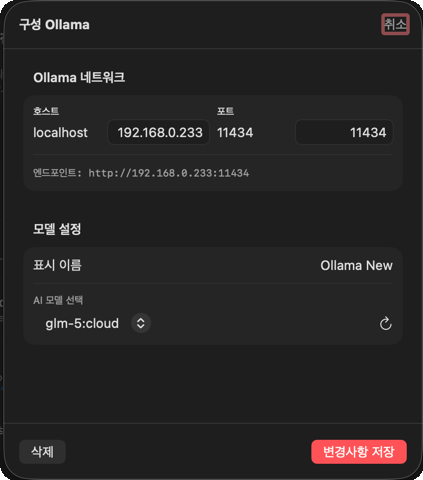
| Field | Description |
|---|---|
| Display Name | Display name for the provider (free text) |
| Select AI Model | Model to use (dropdown or manual entry) |
For Ollama, additional Host and Port fields are shown. For local use, keep the defaults (
localhost:11434). To use Ollama on a remote server, enter that server's IP and port.
Checking Connection Status
A connection status indicator appears next to each provider:
| Status | Meaning |
|---|---|
| 🟢 Available | CLI is installed and ready to use |
| 🔴 Unavailable | CLI is not installed or cannot be reached |
If a provider shows Unavailable, install the CLI first. Refer to the AI CLI Tools section above for installation instructions.
Autonomy Mode
In the Policy & Autonomy section, you can configure the AI Autonomy toggle:
- On (default) — AI agents perform sequential tasks without manual approval
- Off — User approval is requested at every step
For first-time users, the default (On) is recommended. Alliance's Human Checkpoints work independently of this setting.
CLI Path Settings (Advanced)
The Secure CLI Paths field in the Advanced section specifies where to find AI CLI tools. In most cases, paths are auto-detected and no changes are needed.
Only add paths if commands like claude or gemini are not recognized.
Creating Your First Project
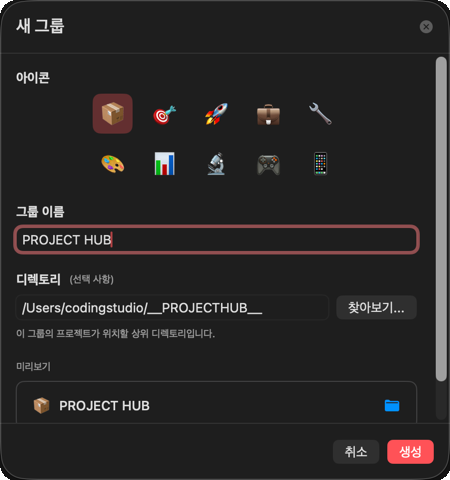
Create a Group
Before creating a project, you need to create a group first. Groups act as folders that organize and manage related projects together.
- Click the folder+ icon (folder.badge.plus) at the bottom of the sidebar
- In the group creation sheet, configure the following:
| Field | Description | Example |
|---|---|---|
| Icon | Select an emoji to represent the group (📦, 🎯, 🚀, 💼, 🔧, 🎨, 📊, 🔬, 🎮, 📱) | 🚀 |
| Group Name | A name to identify the group | Personal Projects |
| Directory | Folder path where group projects are located (optional) | /Users/me/Projects |
- Check the preview at the bottom to see how the group will appear, then click the Create button
Group limits by plan: Free and Standard allow 1 group, Pro allows unlimited groups.
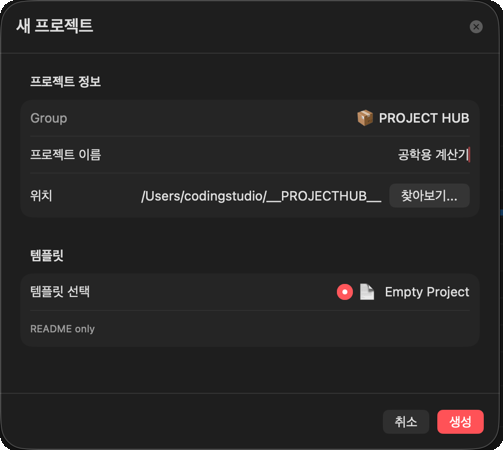
Method 1: Create a New Project
- Click the + button in the toolbar or select File > New Project from the menu
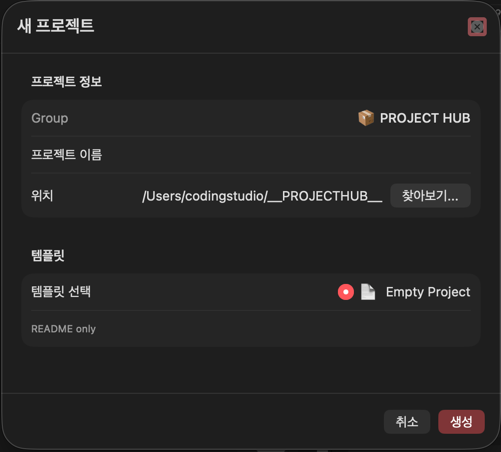
- Enter the project details:
| Field | Description | Example |
|---|---|---|
| Project Name | A name to identify the project | MyCalculator |
| Path | Directory where project files will be stored | /Users/me/Projects/MyCalculator |
| Description | Brief description of the project (optional) | Arithmetic calculator app |
| Language | Primary programming language | Python |
| Priority | Project priority | Medium |
| Status | Current project status | Active |
- Click the Create button
Method 2: Scan Existing Projects
You can automatically detect project folders that already contain files:
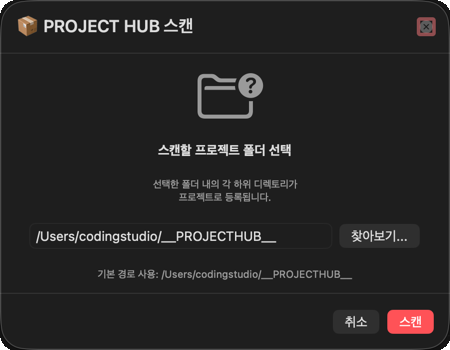
- Click the Scan button (rotating arrow icon) in the toolbar
- Select the directory to scan
- ProjectHub automatically recognizes and registers the project structure
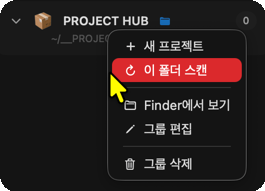
- Once the scan is complete, a list of discovered projects is displayed. Review the projects to register and click the Add button
Scanning detects projects based on configuration files such as
.git,package.json,Cargo.toml,go.mod, and others.
Generating Your First Code with AI
Once a project is created, you can immediately use AI to generate code. ProjectHub offers two AI coding approaches:
Method A: Vibe Coding (Interactive)
Write code through real-time conversation with an AI CLI. Ideal for interactive tasks such as code reviews, debugging, and refactoring.
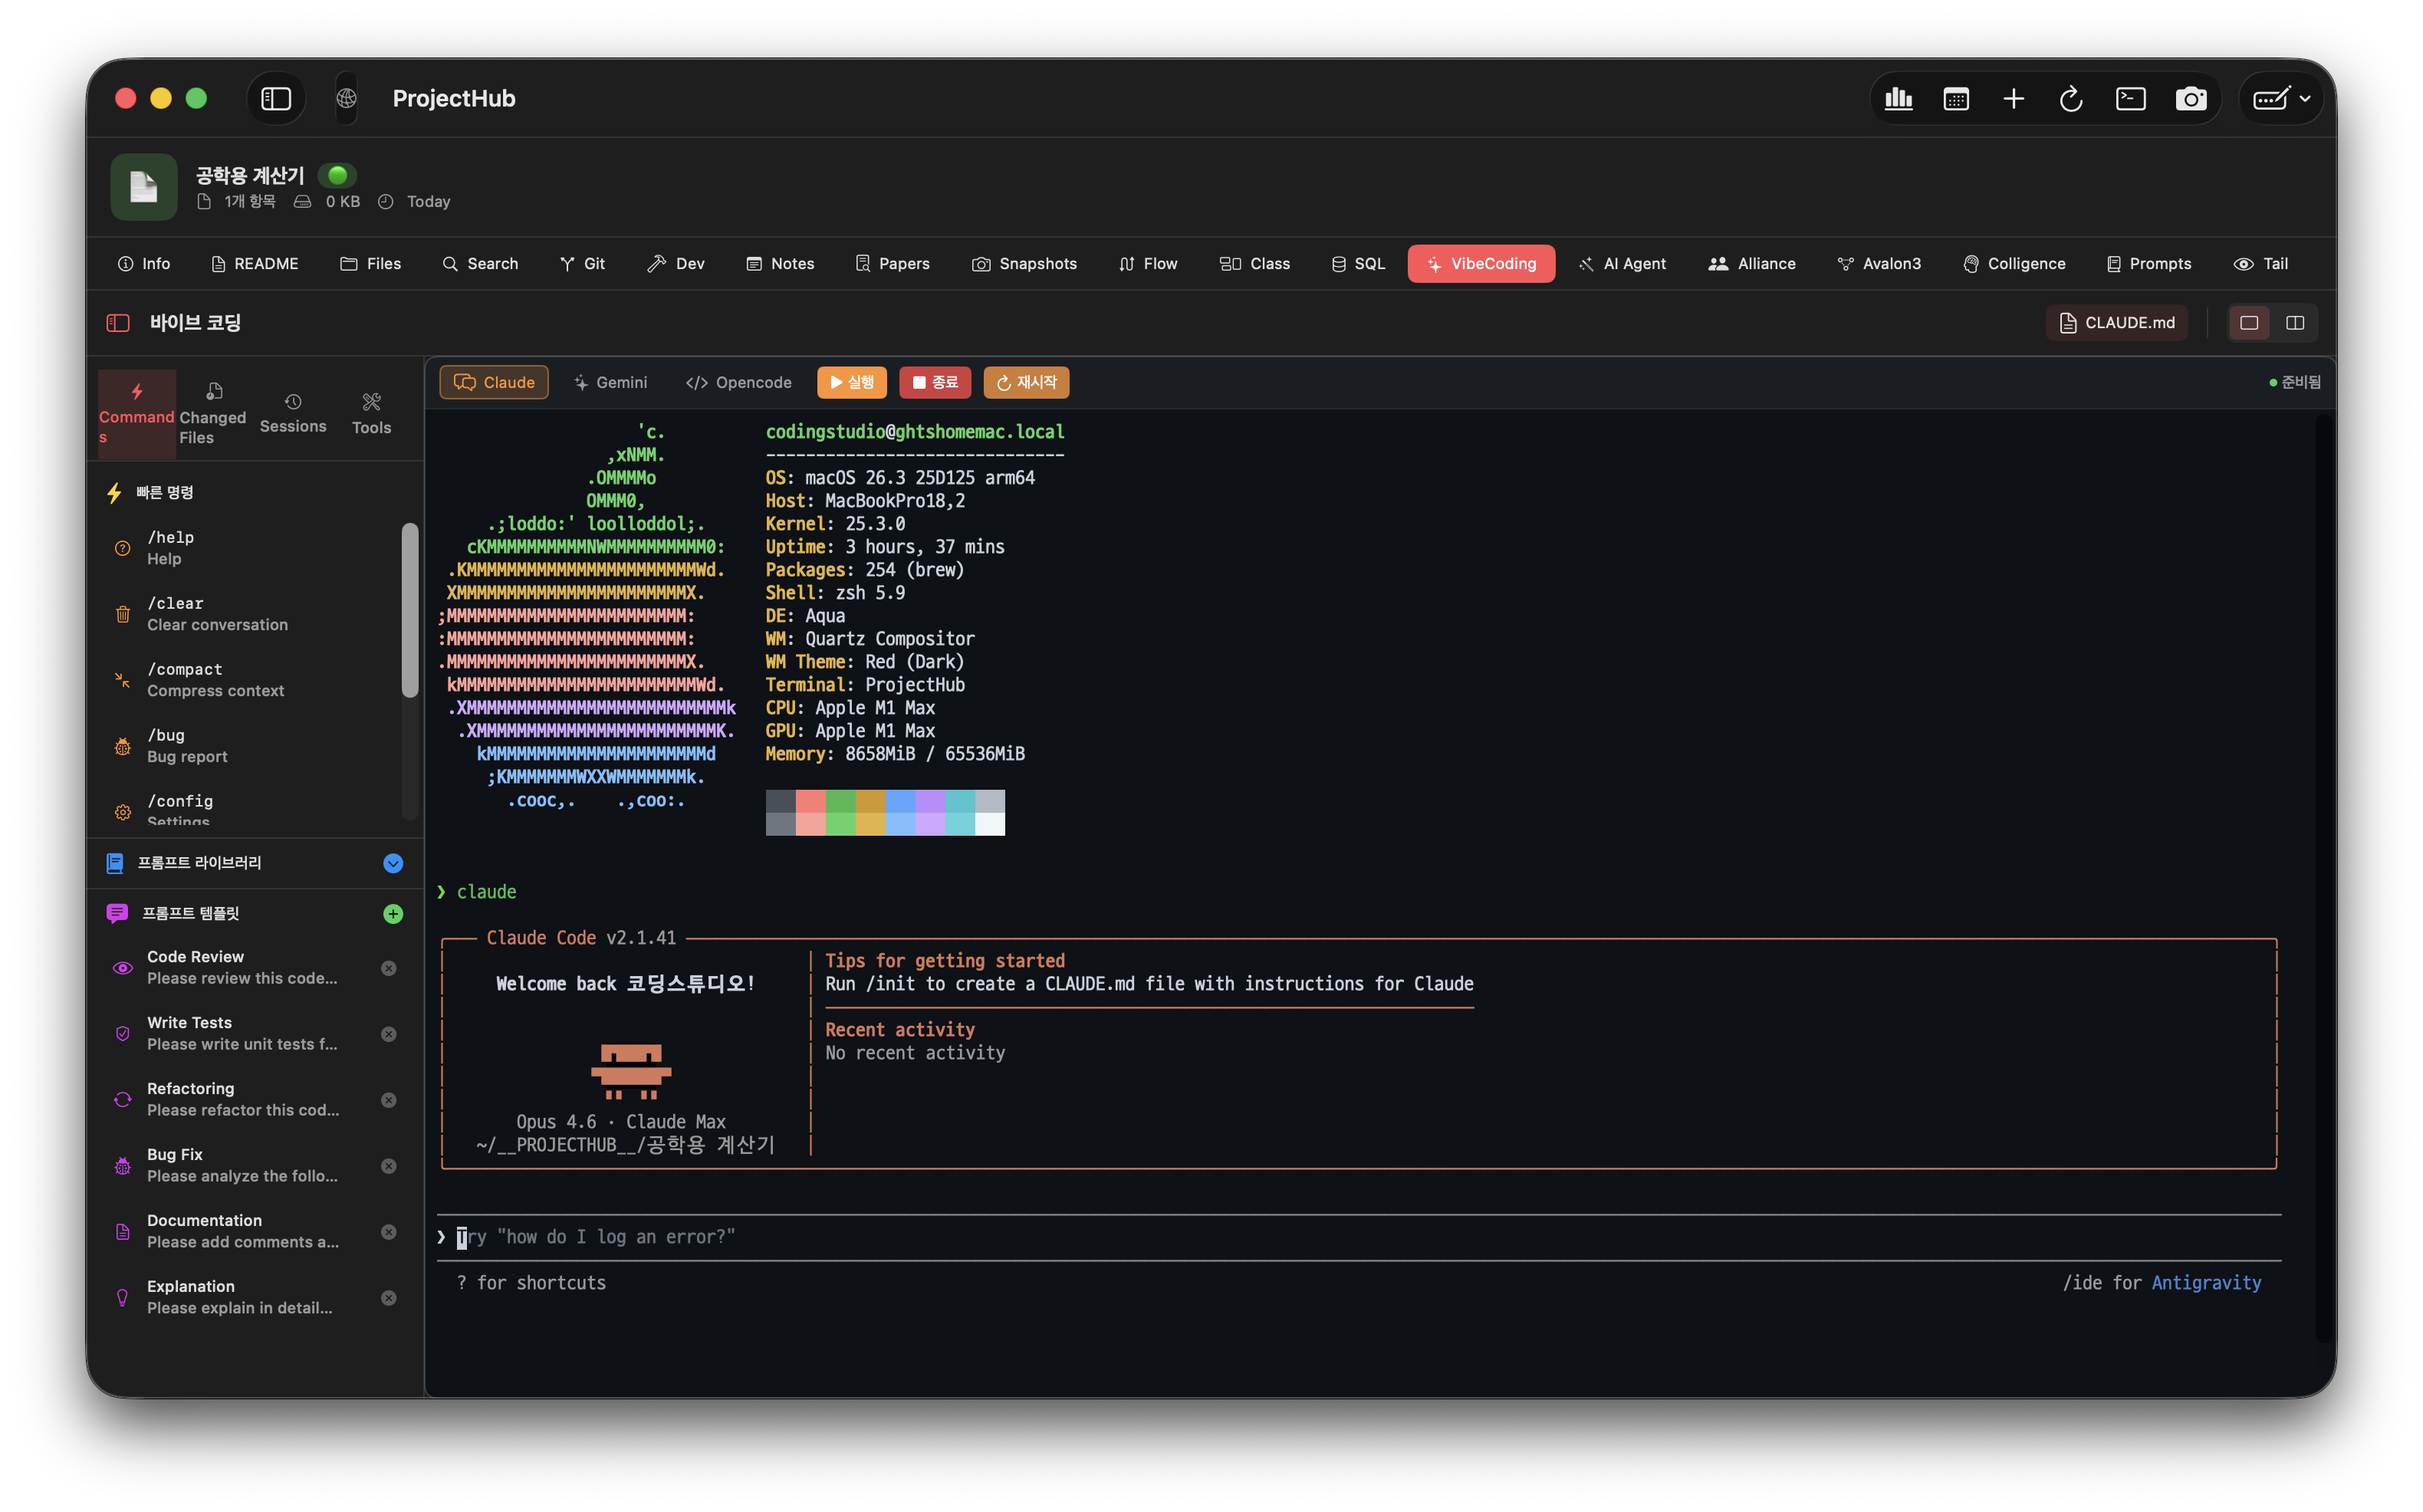
- Click the project in the sidebar
- Click the Vibe Coding tab (sparkles icon)
- Select an AI engine from the top of the terminal (Claude, Gemini, Opencode, Shell)
- Give instructions to the AI just as you would in a conversation
Method B: AI Agent (Autonomous Pipeline)
With a single-line request, the AI autonomously generates an entire project. Ideal for building new projects from scratch.
- Click the project in the sidebar
- Click the AI Agent tab (wand icon)
- Select the AI backend (Claude / Gemini)
- Enter your prompt:
Build a calculator app. I need basic arithmetic operations and percentage calculation.
Make it a single HTML program that runs in a browser.
- Click the Run button and the AI will automatically execute 7 stages:
| Stage | Description |
|---|---|
| 1. Research | Analyze the request and investigate project context |
| 2. Architect | Analyze requirements and design file structure |
| 3. Test Designer | Write test code using TDD approach |
| 4. Coder | Generate the actual code |
| 5. Self-Healing | Automatically detect and fix errors |
| 6. Vision Gate | Verify UI screenshots (when applicable) |
| 7. Report | Auto-generate README.md |

Once all 7 stages are complete, you can review the results of each stage in the process viewer:
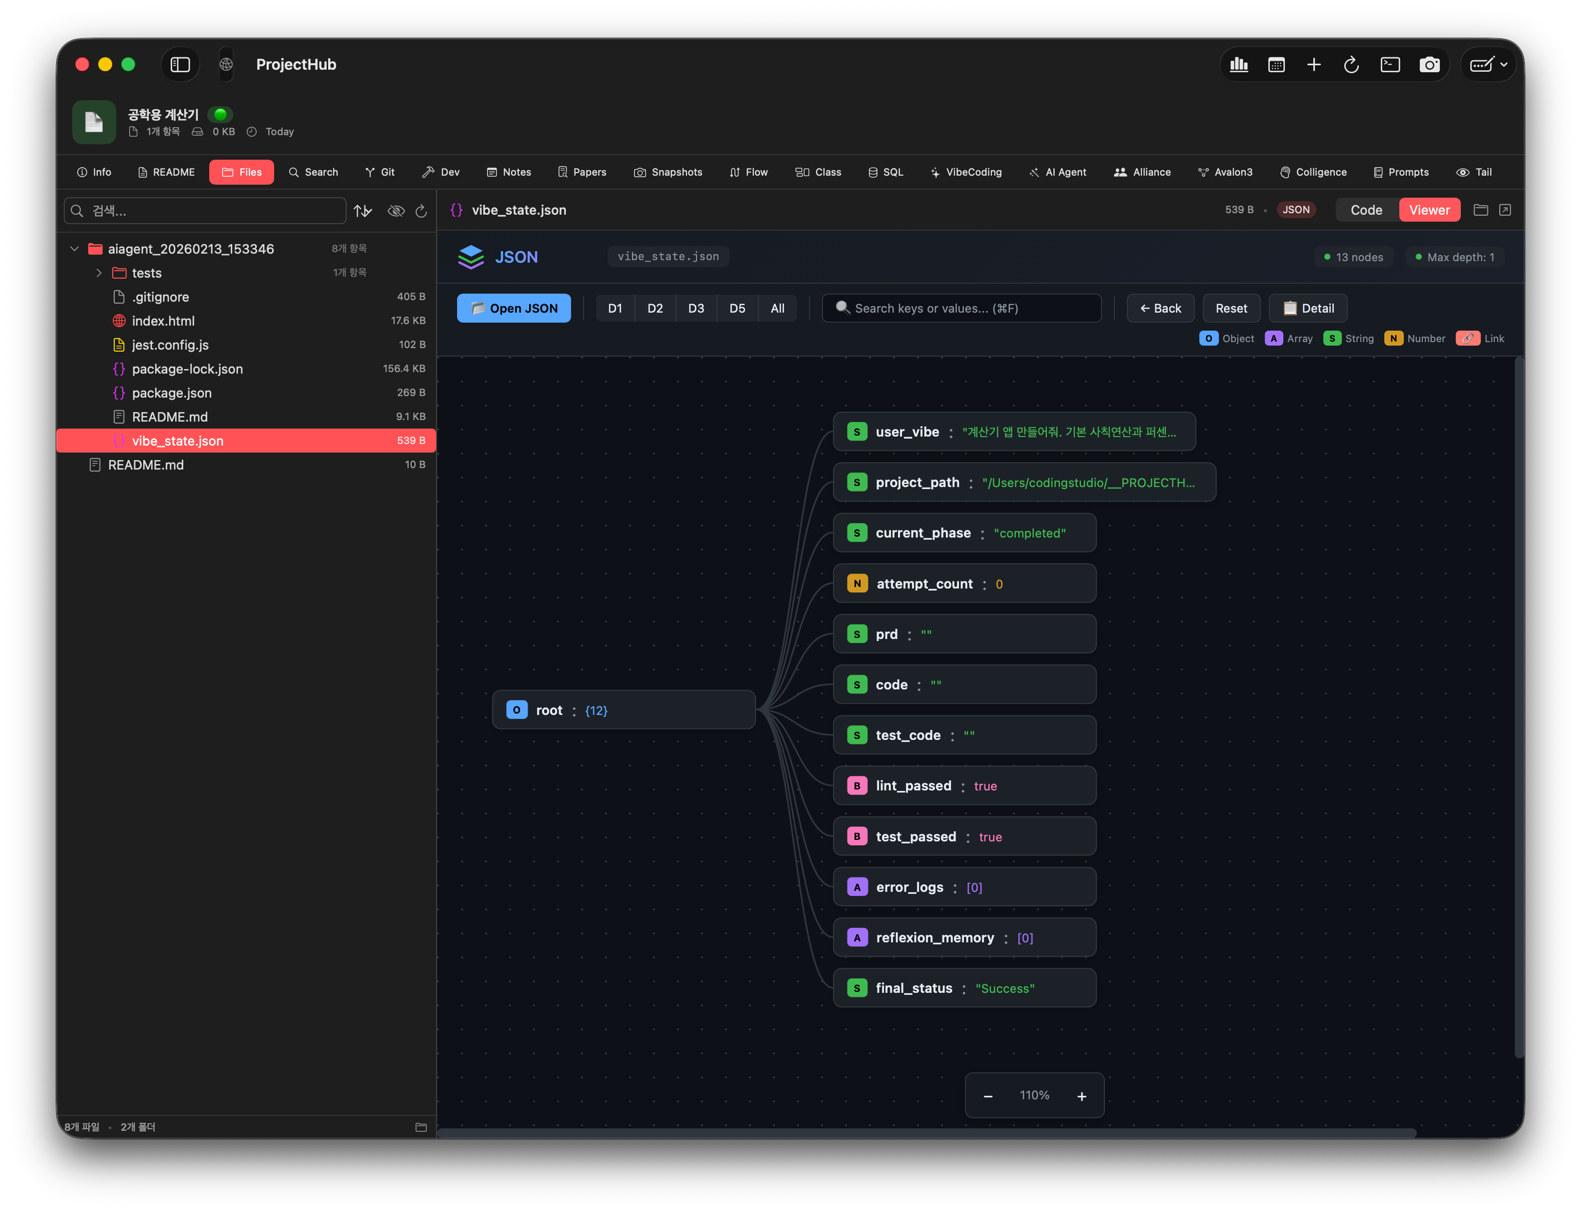
The generated files can be viewed directly in the File Browser tab:
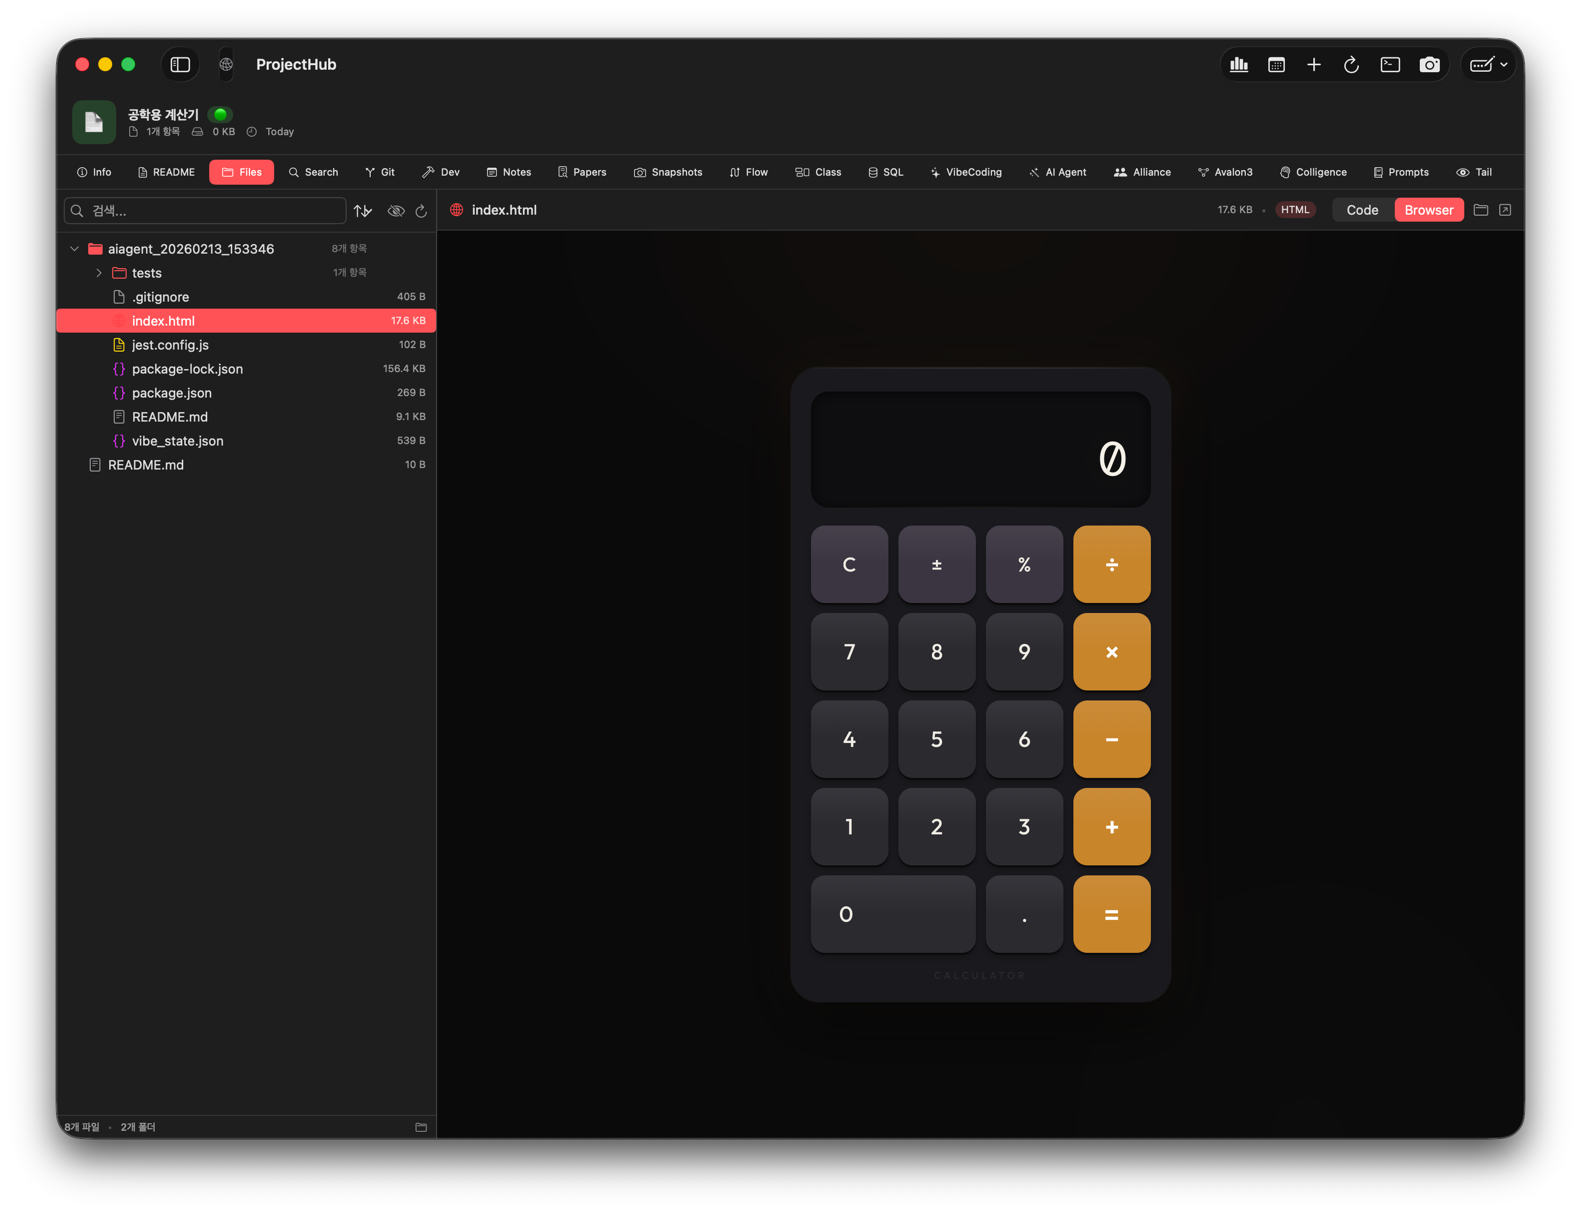
The more specific your description, the better the results. Both Korean and English are supported.
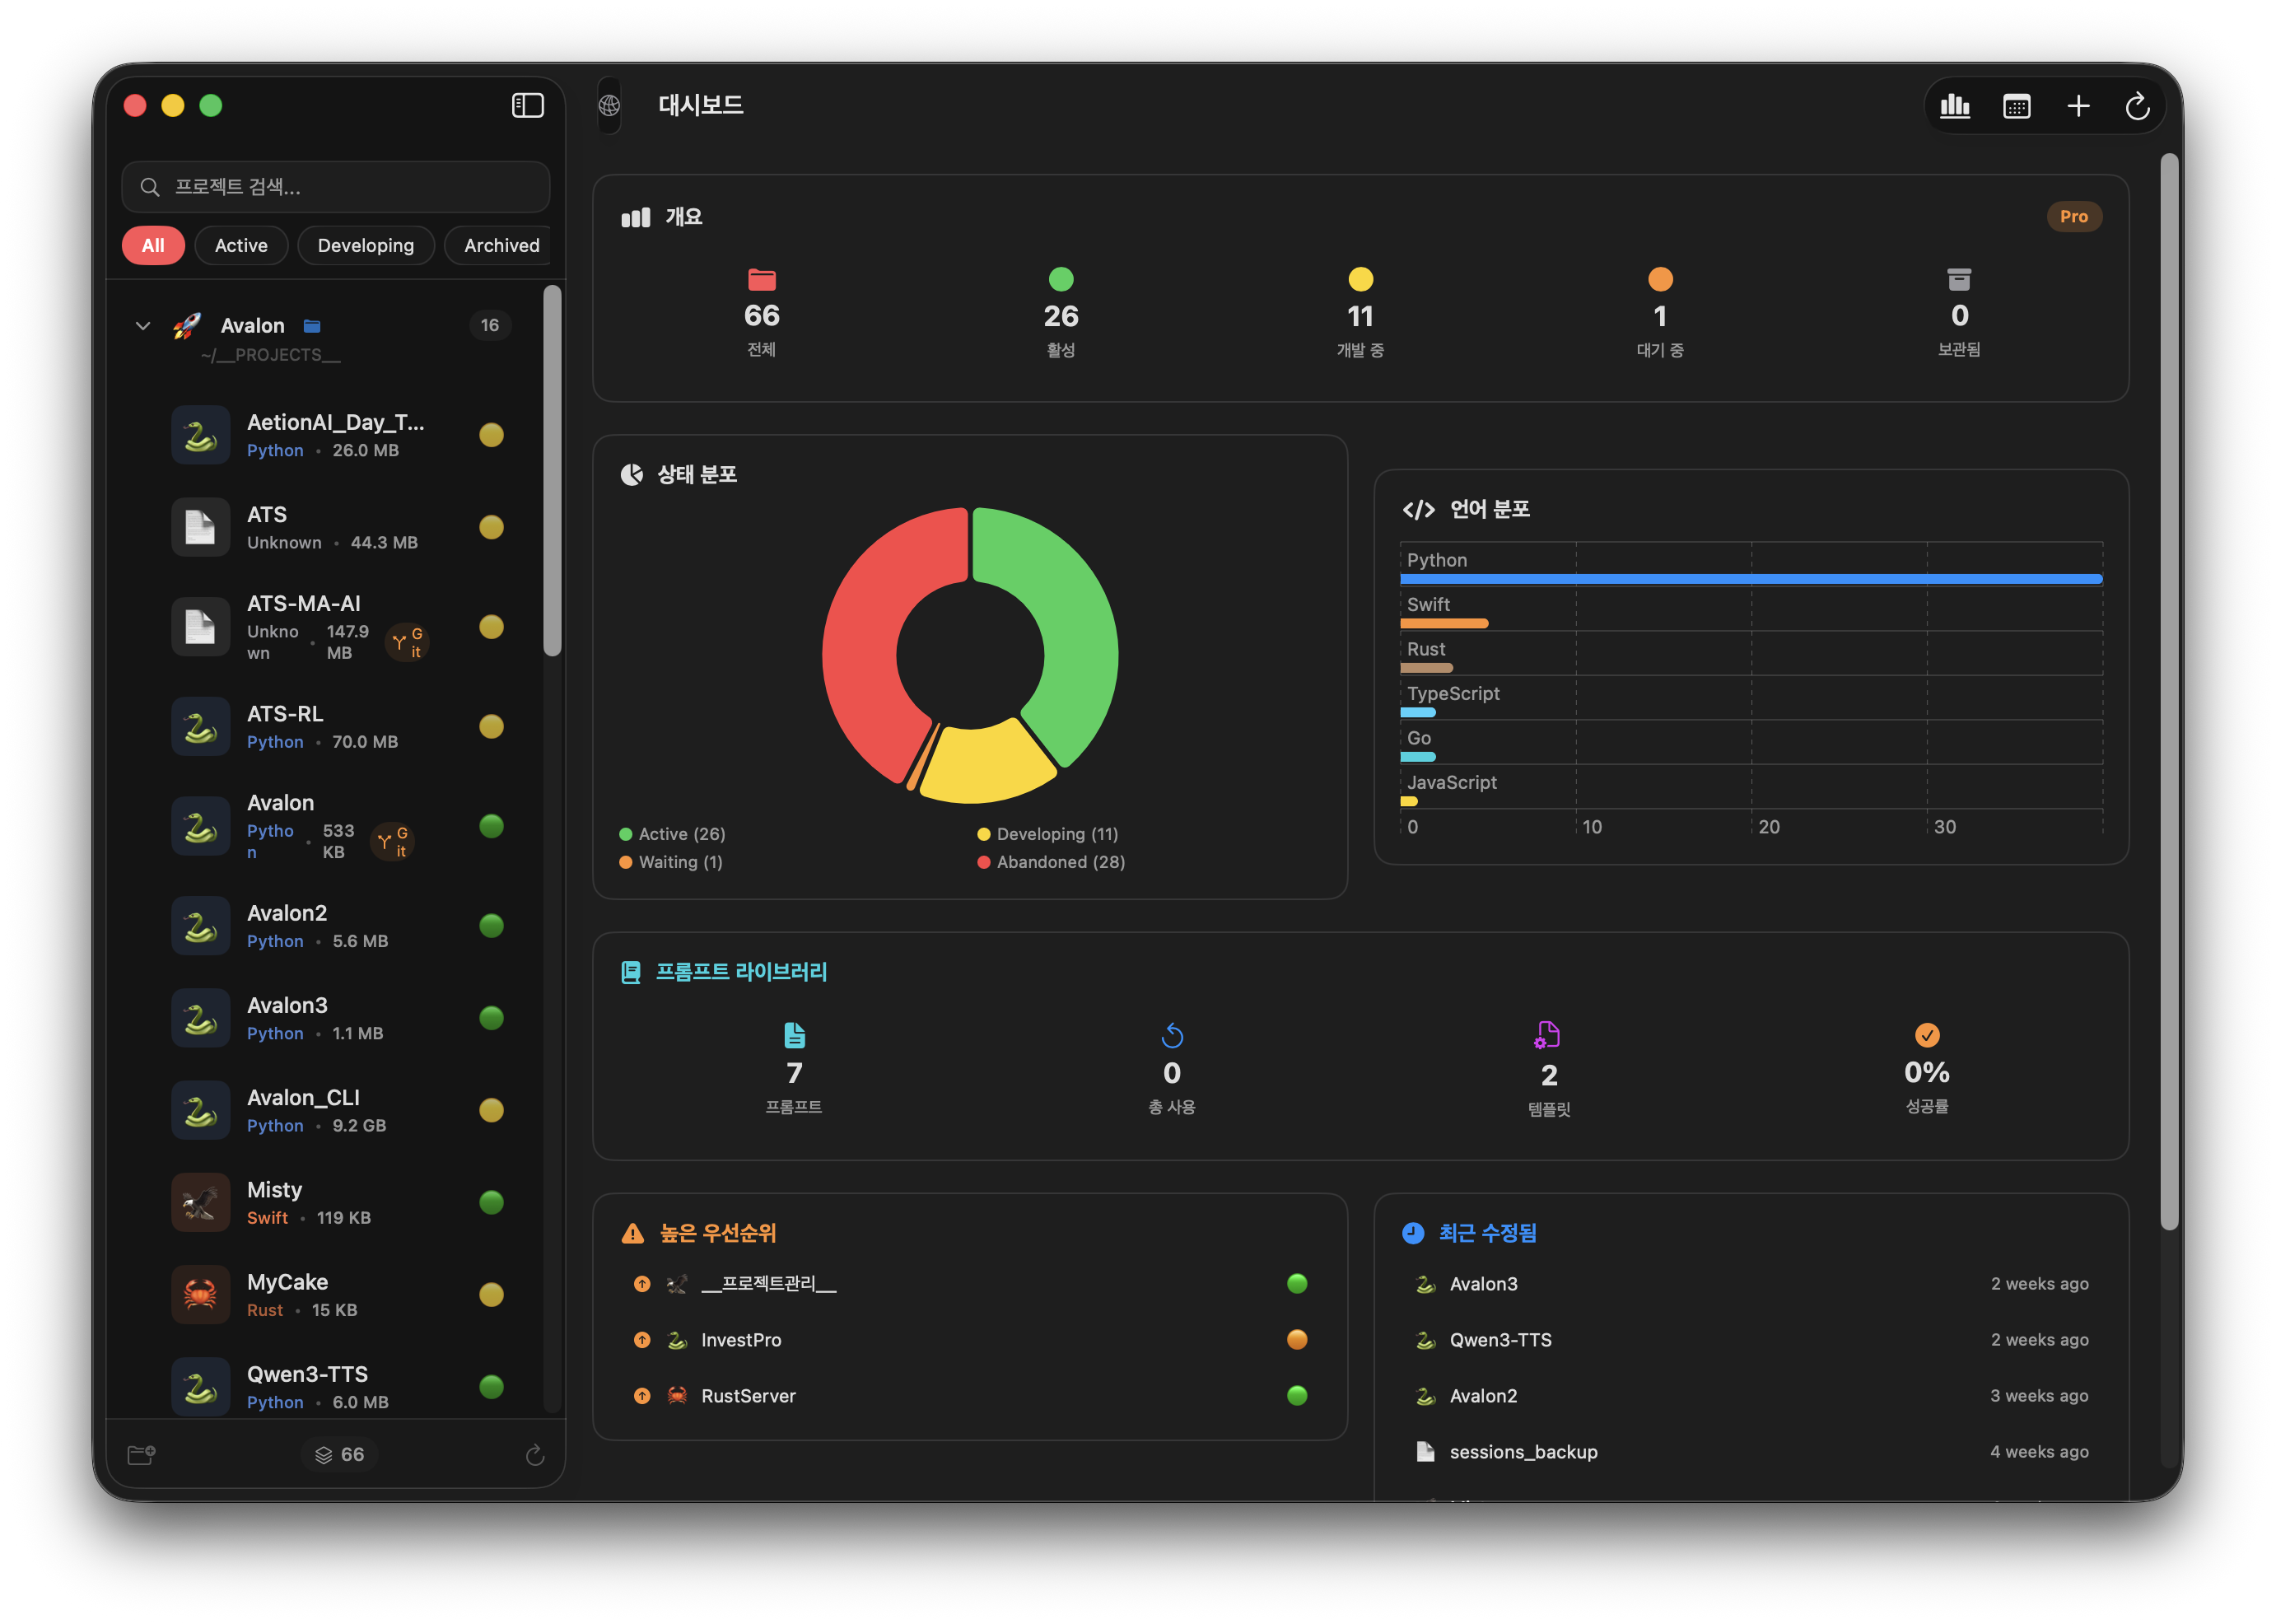
Checking the Dashboard
When no project is selected in the sidebar, or when you click the Dashboard button (Command+D) in the toolbar, you can see an overview of all projects at a glance.
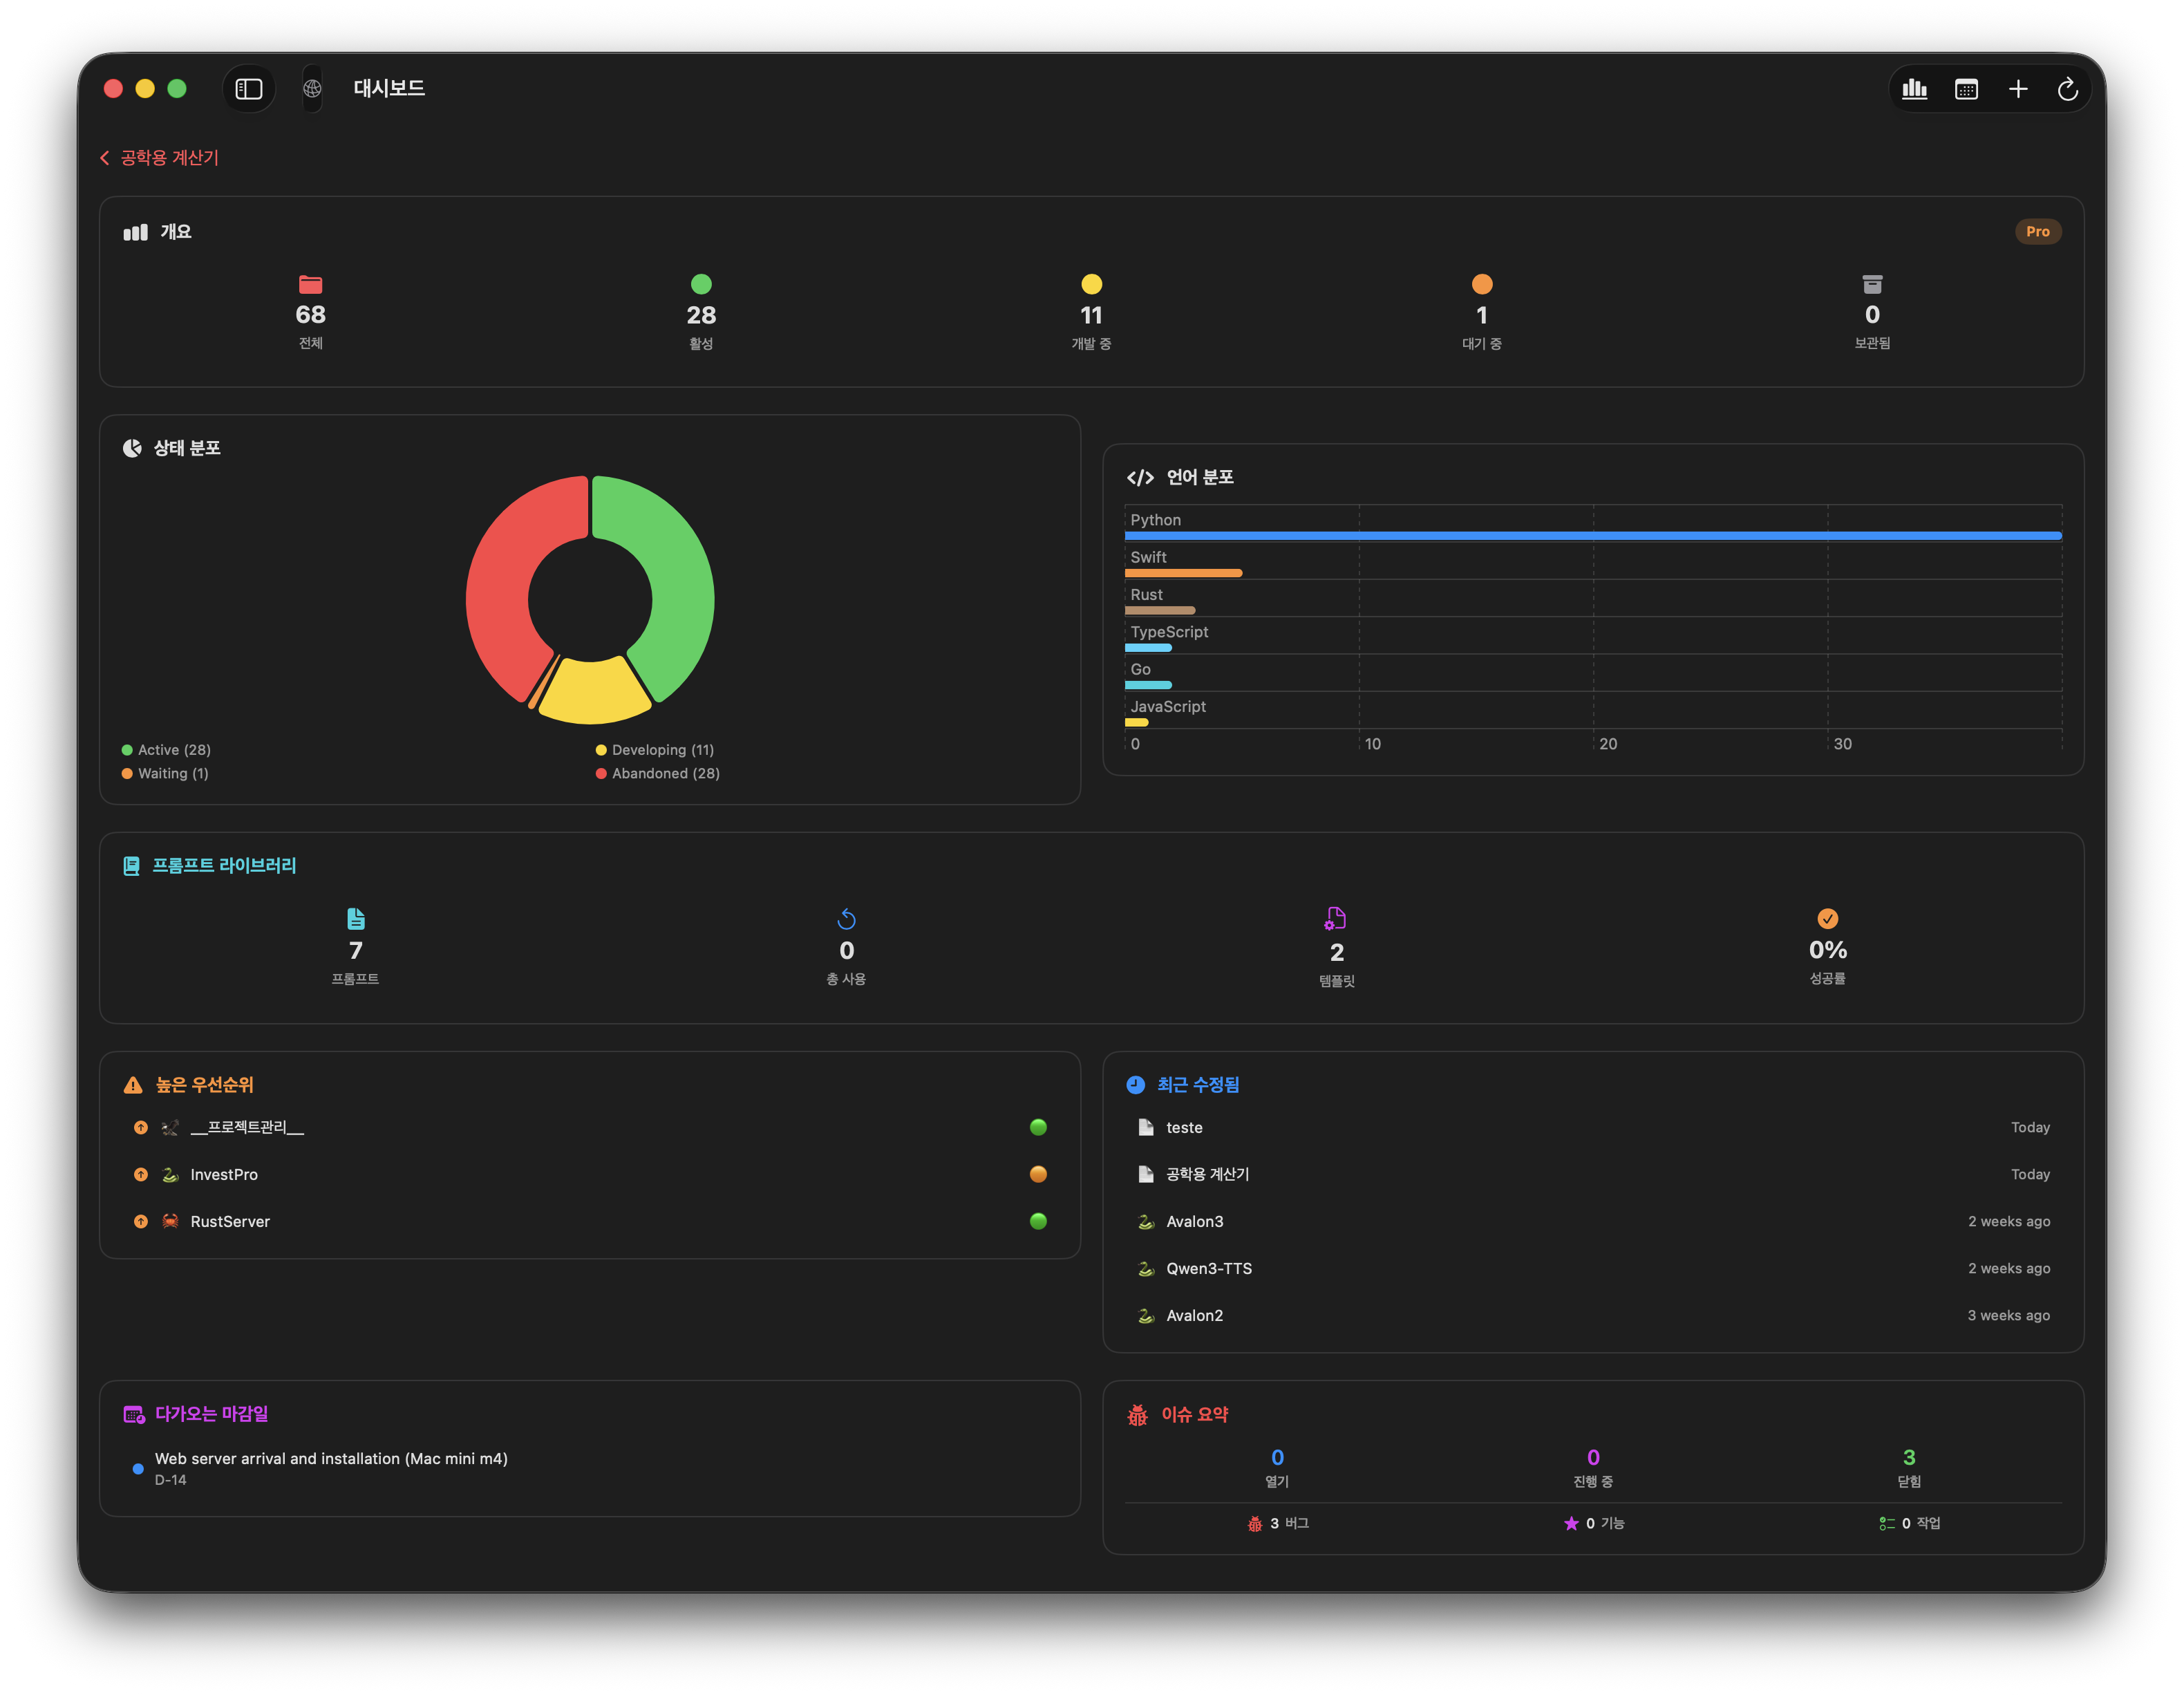
The dashboard displays the following information:
- Project Statistics -- Total, active, in development, waiting, and archived project counts
- Status Distribution -- Pie chart showing project status breakdown
- Language Distribution -- Bar chart showing programming language usage
- High Priority -- Top 5 highest-priority projects
- Recently Modified -- Top 5 most recently modified projects
- Upcoming Deadlines -- Next 5 approaching deadlines
- Issue Summary -- Issue counts by status
Next Steps
Now that you have learned the basics, check out the following guides:
- Project Management -- Project organization, groups, and file browsing
- Snapshots -- Version management system
- AI Agent -- Detailed guide to AI code generation
- Avalon3 -- Building better code through multi-AI debate
- Colligi -- AI collective intelligence analysis
- Shortcuts & Tips -- Shortcuts and tips to boost your productivity